

Posted by L’équipe Ameublement à rabais
on October 05, 2026

Table of Contents
- Project preparation and taking measurements
- Tools for installing a wall shelf
- Wall shelf mounting according to wall type
- Assembling and mounting the shelf to the wall
- Distance between two wall shelves
- Installing a shelf between two walls
- Common errors and troubleshooting
- Frequently Asked Questions
Last updated: October 5, 2026
Project preparation and taking measurements
Before drilling the first hole to install wall shelves, you must prepare your project thoroughly.
First, determine the exact location of the shelf by considering the height, the distance from adjacent walls, and the intended use: a bookshelf is not placed at the same height as a decorative shelf.
Determining placement and height
The ideal height depends on what you will be storing. For a bookshelf, a height between 60 and 150 centimeters from the floor is suitable.
Also, verify that no electrical cables or pipes run behind the wall at the chosen spot.
Mark the location with a pencil to visualize the result, and use a tape measure and a level to validate the reference points before drilling.
Checking the level and marking reference points
A spirit or laser level ensures the shelf is horizontal, as even a slight tilt becomes visible once loaded. Draw a light horizontal line with a pencil to position the brackets.
Measure the distance between the bracket mounting points and mark them on the wall to avoid alignment errors.
Double-check your measurements before drilling: a drilled hole cannot be moved easily.
Tools for installing a wall shelf
To install wall shelves correctly, you need the right tools: unsuitable tools will damage the wall or result in an unstable installation.
Essential tools: electric drill, drill bit suitable for the wall type, level, tape measure, pencil, and screwdriver.
For safety, wear protective eyewear against dust, a dust mask, and work gloves.
Here are the tools to have on hand:
- Electric drill with charged battery
- Drill bits suitable for the wall type (concrete, drywall, wood)
- Spirit level or laser level
- Tape measure (at least 5 meters)
- Pencil for marking reference points
- Screwdriver suitable for the bracket screws
- Hammer to insert the plugs
- Electrical cable detector
- Protective goggles and gloves
- Dust mask for drilling
Wall shelf mounting according to wall type
The wall type determines the mounting hardware to use, and this is where most projects fail: an ordinary plug will not hold in concrete, and a wood screw alone cannot support a loaded shelf in drywall. Therefore, identify the composition of the wall before drilling.
How to identify your wall type
- Drywall (gypsum): hollow surface; you hear an echo when tapping. Very common in modern houses and condos.
- Concrete or masonry: cold, hard surface without an echo. Common in basements, foundation walls, and some buildings.
- Brick: textured surface, visible joints. Mainly encountered on exterior walls or fireplaces.
- Solid wood or panels: solid-sounding surface, often found in older constructions or wood-paneled walls.
A stud and cable detector confirms the nature of the wall and locates obstacles. In case of doubt regarding a load-bearing wall or a zone with plumbing, consult a professional.
Drywall: suitable plugs and anchors
Since drywall is hollow, the mounting hardware must expand behind the surface to distribute the load. Common options:
- Plastic expansion plugs: for light loads only (small decorative shelves).
- Toggle bolts (Molly type): they expand behind the wall and offer better grip for moderate loads.
- Spring or wing anchors: useful when you cannot access behind the wall.
- Direct mounting into studs: the most solid solution. Studs are generally spaced 40 cm (16 inches) or 60 cm (24 inches) apart depending on construction. A stud finder allows for precise localization.
For a shelf that will hold books or heavy objects, aim for the studs. If no stud is available where desired, add a reinforcement board screwed into the studs, then attach the shelf to it.
Concrete and masonry: drilling cleanly
Concrete is solid but demanding. Plan for:
- A concrete drill bit (carbide-tipped) and a drill with a hammer function.
- Nylon or metal expansion plugs, sized according to the screw and the load.
- Slower drilling, with constant pressure, to avoid overheating the bit.
Before drilling, verify that no cables or pipes are running through the area. A poorly placed hole in concrete is difficult to repair cleanly.
Brick: watch the joints and surface
Drill brick with a masonry bit, in the center of the brick rather than in a joint, which offers less grip. Expansion plugs are suitable, but a longer plug is sometimes necessary to cross the finishing layer.
Quick comparison table
| Wall type | Recommended mounting | Indicative load | Note |
|---|---|---|---|
| Drywall (between studs) | Toggle or spring anchors | Light to moderate | Ideal for small shelves |
| Drywall (into a stud) | Wood screw directly into the stud | Moderate to heavy | Most reliable solution |
| Concrete | Nylon or metal expansion plugs | Moderate to heavy | Concrete bit required |
| Brick | Expansion plugs, masonry bit | Moderate | Avoid joints |
| Solid wood | Wood screw | Moderate to heavy | Check thickness |
Attention
The indicated loads are general guidelines. Real-world capacity depends on wall thickness, installation quality, and plug type. When in doubt, consult a hardware store or professional.
The case of floating shelves
Floating shelves often use invisible brackets that require solid fixation into a stud or solid wall. In drywall alone, a loaded floating shelf risks pulling out: fix it to the studs or choose a model designed for hollow walls with suitable anchors.
Assembling and mounting the shelf to the wall
Once measurements are taken and tools gathered, installation can begin: it requires precision and patience.
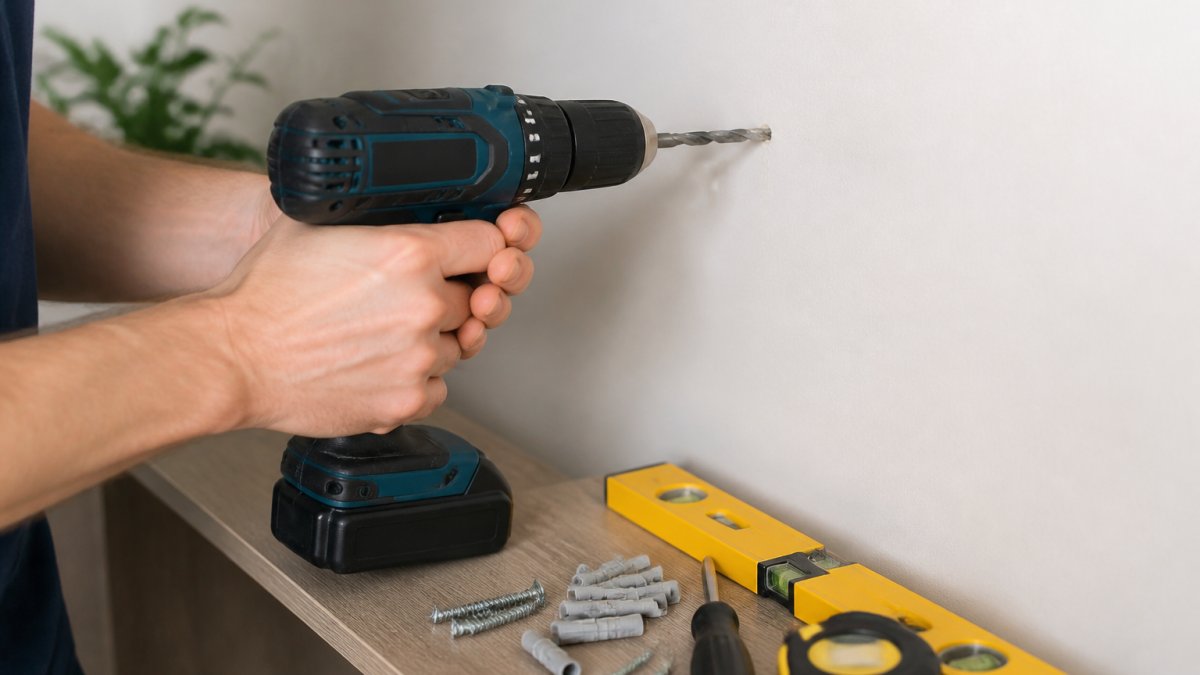
Drilling holes and installing plugs
Use the drill bit appropriate for the wall type: a standard bit for drywall, a masonry bit for concrete.
Drive the plugs flush with the wall and verify they are securely in place before screwing in the brackets.
Some plugs are installed before drilling, others after: read the manufacturer's instructions, as an improperly installed plug can cause the shelf to fail.
Screwing in supports and checking for plumb
Screw the supports into the plugs with the appropriate screwdriver, firmly but without forcing, so as not to damage the wall or the plugs.
Before placing the shelf, check with a spirit level that the supports are at the same level; otherwise, the shelf will not be stable.
Place the shelf on the supports and check that it does not slide. If it wobbles, ensure the brackets are securely attached and level.
Wall coat rack with shelf, white →
Distance between two wall shelves
20 to 25 centimeters is enough for plates or cups, and the spacing can be adapted to the visual effect desired for decorative objects.
Mark all locations before drilling: a pencil and level allow you to trace the marks for each shelf and correct them before starting.
Here are recommended spacings based on usage:
- Paperbacks: 20-25 centimeters
- Standard size books: 25-30 centimeters
- Dishes and plates: 20-25 centimeters
- Large decorative objects: 30-40 centimeters
- Plants and small objects: 15-20 centimeters
Installing a shelf between two walls
Installing a shelf between two walls requires precise adjustment: if it's too short, it leaves gaps; if it's too long, it won't fit.
If the shelf is fixed to both walls, mount brackets on each side to distribute the weight, and verify they are at the same level before placing the shelf.
Specialized plugs allow for invisible brackets that hide behind the shelf for a clean look, ideal for small, light shelves.
Common errors and troubleshooting
Even with good preparation, an installation can run into problems. Here is how to recognize the symptoms, the probable cause, and the fix.
The shelf tilts forward or to the side
Symptom: the shelf is not level once loaded.
Probable cause: brackets are misaligned or the wall is not straight.
Solution: remove the shelf and check the levelness of the brackets. If the wall is irregular, add a thin shim behind the lower bracket or reposition them. Never compensate by overloading one side.
The shelf moves laterally
Symptom: the shelf slides or pivots slightly.
Probable cause: screws not tightened properly or undersized plugs.
Solution: tighten the screws. If the movement persists, replace with longer screws or more robust plugs. For a long shelf, add a third support in the center.
A cracking sound when loading the shelf
Symptom: cracking or squeaking sound when placing an object.
Probable cause: the plug is not securely anchored or the hole is too large.
Solution: remove the screw and plug. If the hole is too large, use a larger diameter plug or fill it with a drywall repair compound, let it dry, then redrill. For heavy loads, move the mounting point to a stud.
The hole is too large or the plug spins in the void
Symptom: the plug does not hold; it spins.
Probable cause: drill bit too large or crumbling wall.
Solution: switch to a larger-gauge wall plug designed for enlarged holes, or use a toggle anchor that expands behind the wall. As a last resort, move the fixture a few centimeters.
The shelf is pulling away from the wall
Symptom: the fixture gives way under the load.
Probable cause: load exceeds the plug's capacity, or fixing into drywall without a stud.
Solution: remove the shelf and inspect the damage. If the drywall is torn, patch it, then re-anchor into a stud or add a reinforcement board. Reduce the load or distribute the weight across more brackets.
Errors to avoid from the start
- Drilling without checking for cables or pipes.
- Choosing wall plugs before identifying the wall type.
- Skipping the leveling step.
- Overloading a shelf beyond what the fixture can support.
- Using wall plugs that are too small for the intended load.
- Failing to tighten the brackets properly.
- Installing the shelf without verifying it is secure.
Pro Tip
Before fixing permanently, perform a progressive load test: place a few light items, check stability, then increase gradually. This allows you to detect a problem before it causes damage.
When to call a professional
If the wall is made of reinforced concrete, if cables or pipes are suspected, or if the shelf needs to support a significant load (full bookcase, appliances), consult an electrician, carpenter, or specialized hardware store: a failed installation can damage the wall and present a risk of falling.
Frequently Asked Questions
What tools are needed to install a wall shelf?
Essential tools include a spirit level to check for plumb, a stud finder to locate the wall structure, a drill to create the holes, a screwdriver (manual or electric) to fasten the brackets, and a tape measure for precise dimensions. A cable and pipe detector is also recommended to avoid risks. A pencil to mark the spots completes the basic equipment.
How do I know which type of fastener to use for a wall shelf?
The type of fastener depends on your wall. For drywall, use expansion plugs or toggle anchors that distribute the load over a larger surface area. For concrete and brick, prefer percussion anchors or expansion bolts. Always check the fastener's load capacity against the weight you plan to put on the shelf. Manufacturers generally indicate the maximum supported load.
What is the ideal distance between two wall shelves?
The spacing depends on the intended use. For standard-sized books, 25 to 30 cm between shelves offers a good balance. For decorative objects or small items, 20 to 25 cm may suffice. If you are storing files or taller boxes, plan for 35 to 40 cm. Always measure the height of the items you will place there to determine the optimal spacing.
How do I check that a wall shelf is straight?
Use a spirit level placed on top of the shelf. The bubble must stay in the center of the viewing window to indicate that the shelf is perfectly horizontal. Check at several points along the shelf, not just at the ends. If the shelf is not level, adjust the brackets before permanently fixing the load.
